997 Red Tail Light Installation Guide
997 Red Tail Light Installation Guide
Company Info
|
Carrera Red Tail Light Installation |
|
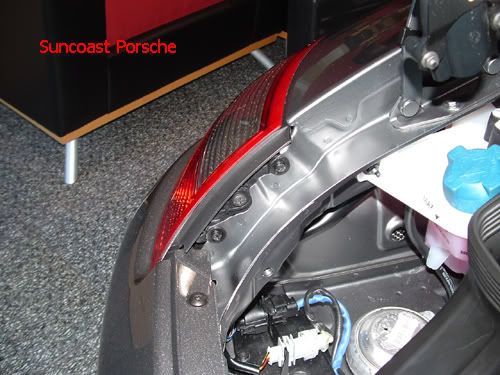
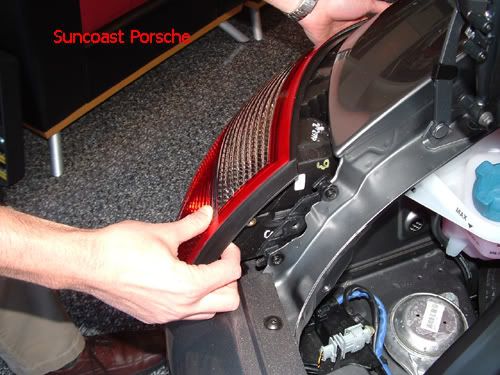
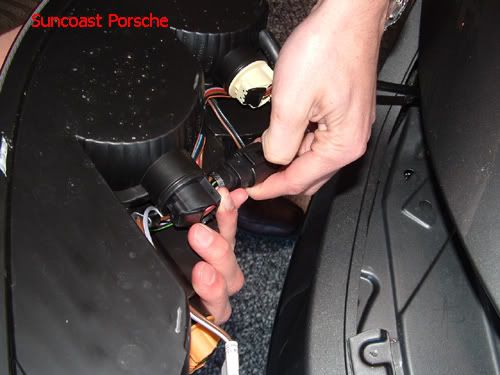
| If you're looking to add a unique look to your Carrera, the Red Tail Light Kit is a great way to go. They add a more distinct look, and almost add a 993 look. Installation is a breeze, only one bolt secures each light. Tools Required: Phillips Screw Driver (Large) To start the project, open the rear trunk and make sure that the car is off (with the keys out of the ignition). You will notice three screws by the tail light, remove the larger one with the Phillips head. Remove the screw, and be careful not to drop it. Gently remove the lens, and avoid contact with the bumper cover. Once removed, the wiring harness has to be unplugged. Press the release clip, and they the light will be completely disconnected. Now you're ready for the Red Lights! Plug in the harness, make sure it is secure. Gently slide the light into place, and avoid contact with the bumper cover/quarter panel. Check the gaps around the perimeter for proper alignment. Replace the screw and tighten until it is snug. Now it's time to check the bulb operation, you may need a friend to assist you. Verify that the brake lights, running lights, turn signals, and reverse lights are working properly.
If you have any comments or recommendations, please let us know. This is just a reference guide, if you're uncertain about installing any parts or accessories, please let a professional help you. Suncoast is not responsible for any damage or issues resulting from improper installation. |
|
|
|
|
|
|
|
 Reinstall Bolt |
|
 Very Nice! |